There may come a time, sooner than later, where you realize that it is not so easy to make every feature you had dreamed of out of clay or cardboard to mold over. While I was attempting to make a rounded beak for my Owl Mask, I tried cardboard and just couldn't get the right shape (not to mention it would have gotten soggy when wet which would have warped the shape either way). So after spending 4 hours of my day trying to make this rounded owl's beak, I finally found that this method worked the best.
Making an Armature out of Aluminum Wire and Super Sculpey
I've added product links to both dickblick and amazon so if you have a place you prefer to shop you can choose either one. I know I bounce back and forth myself!
What you'll need:
12 gauge aluminum wire Sculpture Armature Wire or Aluminum Craft Wire
Super Sculpey @ DB or Super Sculpey @ Amazon
tinfoil
small pliers
scissors (to cut wire)
paper towels
rubbing alcohol (for smoothing)
sandpaper (rough and fine)
an oven.
Step 1: Make the basic frame for your shape
This is the hardest part! I have tried this with thinner wire and it was impossible. I have also tried it without pliers and it was equally impossible. Don't worry too much about exactness here as a lot of the excess shape can be sanded off. Use the pliers to crimp the wire down firmly where it connects.

Step 2: Cover your frame with wireform
This can also be hard depending on the shape. Try to keep the wireform as flat as you can so it doesn't crimp up in unwanted sections - like it did on mine! Use the pliers to clamp down that wire around the edges. You can use them to flatten a bit too if needed.

Step 3: Cover your finished frame with Super Sculpey
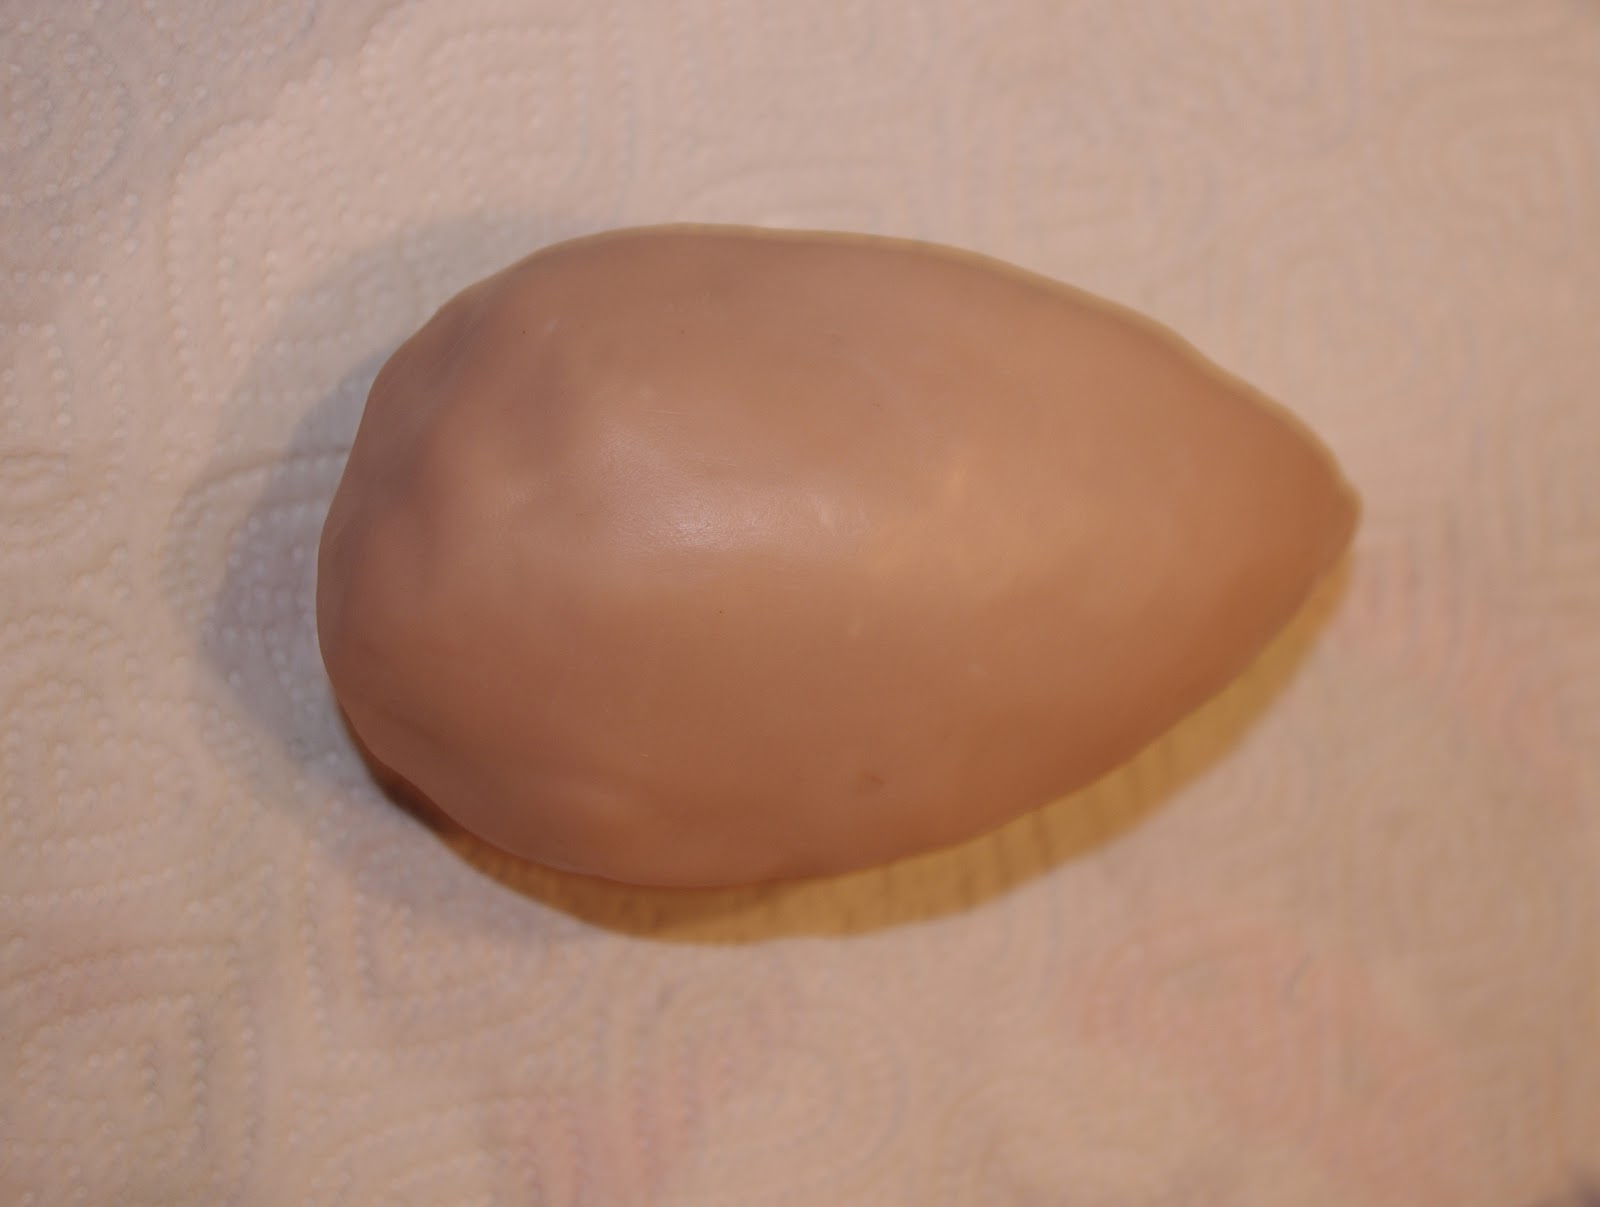
The easiest way to do this is to eye about enough to cover your frame and work it in your hand until it is soft. Then roll it out with a rolling pin so it's nice and even. Don't roll it out too thin so that you have room to sand. Place the rolled out sculpey over the frame and press it up under the edges. Make sure all underneath the frame (the part nobody sees) is nice and tight by pressing it firmly; make sure the sides are how you want them to look for the most part.
Step 4: Smooth and bake your feature
Use some wadded up paper towels doused in rubbing alcohol to smooth out your shape. When you've got it about right, get some tinfoil to make a wad big enough to support your piece in the oven. Especially if your shape has a point like mine did, you will need it to be perched off the surface and kept from rolling around! Follow the directions on your sculpey package for temperature and baking time.

Step 5: Sand it
Once it's done cooking, let it sit for awhile before touching it. I have touched sculpey too soon and it will actually crack so to be safe, just let it be for a few hours before you try to sand it. I used 120 grit sand paper to sand my beak into perfection. The frame originally had some lumps so it was nice to be able to just sand them off the top part. Use a circular motion to keep it level and even. I finished it with some fine grit sand paper.

Step 6: Seal and decorate
Seal your beak with whatever you have available. I used some clear coat acrylic paint, others like to use polyurethane, but they both do the same thing. You can even seal it with gesso if you need the base to be white for painting. I painted mine silver and mounted it to my owl mask. There may be an easier way to do this that I have yet to discover, but for now this is a simple enough method of getting the job done.
Thanks for Reading and Happy Creating!

Making an Armature out of Aluminum Wire and Super Sculpey
I've added product links to both dickblick and amazon so if you have a place you prefer to shop you can choose either one. I know I bounce back and forth myself!
What you'll need:
12 gauge aluminum wire Sculpture Armature Wire
Super Sculpey @ DB or Super Sculpey @ Amazon
tinfoil
small pliers
scissors (to cut wire)
paper towels
rubbing alcohol (for smoothing)
sandpaper (rough and fine)
an oven.
Step 1: Make the basic frame for your shape
This is the hardest part! I have tried this with thinner wire and it was impossible. I have also tried it without pliers and it was equally impossible. Don't worry too much about exactness here as a lot of the excess shape can be sanded off. Use the pliers to crimp the wire down firmly where it connects.

Step 2: Cover your frame with wireform
This can also be hard depending on the shape. Try to keep the wireform as flat as you can so it doesn't crimp up in unwanted sections - like it did on mine! Use the pliers to clamp down that wire around the edges. You can use them to flatten a bit too if needed.

Step 3: Cover your finished frame with Super Sculpey
The easiest way to do this is to eye about enough to cover your frame and work it in your hand until it is soft. Then roll it out with a rolling pin so it's nice and even. Don't roll it out too thin so that you have room to sand. Place the rolled out sculpey over the frame and press it up under the edges. Make sure all underneath the frame (the part nobody sees) is nice and tight by pressing it firmly; make sure the sides are how you want them to look for the most part.
 |
Use some wadded up paper towels doused in rubbing alcohol to smooth out your shape. When you've got it about right, get some tinfoil to make a wad big enough to support your piece in the oven. Especially if your shape has a point like mine did, you will need it to be perched off the surface and kept from rolling around! Follow the directions on your sculpey package for temperature and baking time.

Step 5: Sand it
Once it's done cooking, let it sit for awhile before touching it. I have touched sculpey too soon and it will actually crack so to be safe, just let it be for a few hours before you try to sand it. I used 120 grit sand paper to sand my beak into perfection. The frame originally had some lumps so it was nice to be able to just sand them off the top part. Use a circular motion to keep it level and even. I finished it with some fine grit sand paper.

Step 6: Seal and decorate
Seal your beak with whatever you have available. I used some clear coat acrylic paint, others like to use polyurethane, but they both do the same thing. You can even seal it with gesso if you need the base to be white for painting. I painted mine silver and mounted it to my owl mask. There may be an easier way to do this that I have yet to discover, but for now this is a simple enough method of getting the job done.
Thanks for Reading and Happy Creating!

If you found this post helpful please share it with your friends! I also love a comment! You can get up to the minute updates by following me on Facebook by clicking here. I'm also on Youtube now; please subscribe by visiting my channel here.
No comments:
Post a Comment